Registration on TeamSnap for Business
TeamSnap for Business offers advanced registration capabilities designed to streamline the registration process for organizations. This comprehensive guide assists organization administrators in leveraging the robust registration tools effectively.
In this article
Registration builder overview
Creating a new registration form is a breeze with TeamSnap for Business. To begin, navigate to the Registration tab in your account. Our new intuitive registration builder provides a step-by-step guide through the form setup process.
Note: You can pause using the Save and Exit button and resume the setup anytime, ensuring flexibility in the creation process.
Here’s what each step allows you to do:
-
General information
In the "General" section, input essential details such as the program, season, and form name. Optionally, you can set registration period dates to open/close registration as needed. (Note: registration open and close dates are set in the organization timezone so if you are outside of that timezone you may need to manually adjust the time).

-
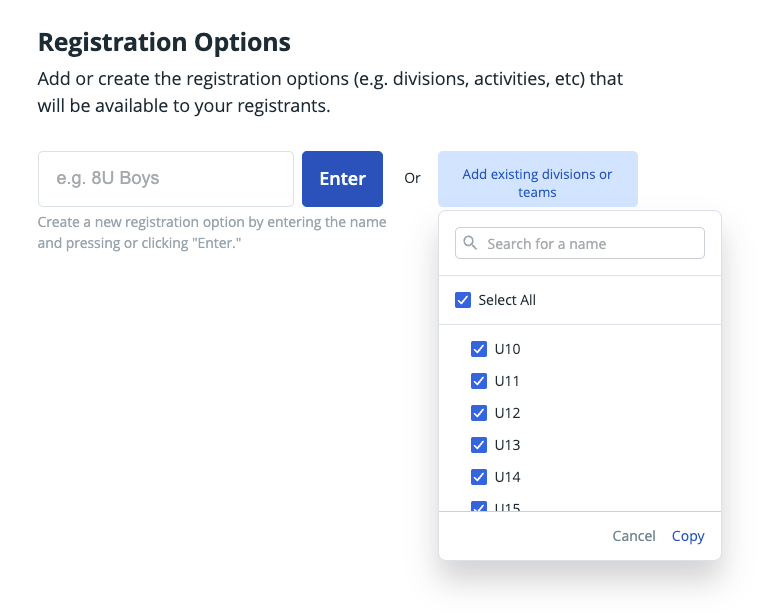
Registration Options
Customize registrant selection items in the "Registration options" section. Add, manage, or populate options from existing divisions or teams within your organization. Assign fee amounts and eligibility rules based on birthdate or gender, offering a tailored selection experience.
-
Form Builder
The "Form Builder" section allows for arranging questions to collect registrant information. Customize default questions and set up digital agreements for mandatory acknowledgments during registration.

-
Checkout Settings
Configure merchant accounts for processing registration payments under "Checkout Settings." Set up multiple deposit accounts associated with different registrations to streamline fund deposits based on specific registration options. Installment plans can be created, and offline payments can be enabled if you plan to offer flexible payment options.

-
Confirmation Message
Craft a personalized "Confirmation message" for registrants, providing post-registration instructions and details.


Key features and functionality
TeamSnap for Business registration feature includes several key functionalities:
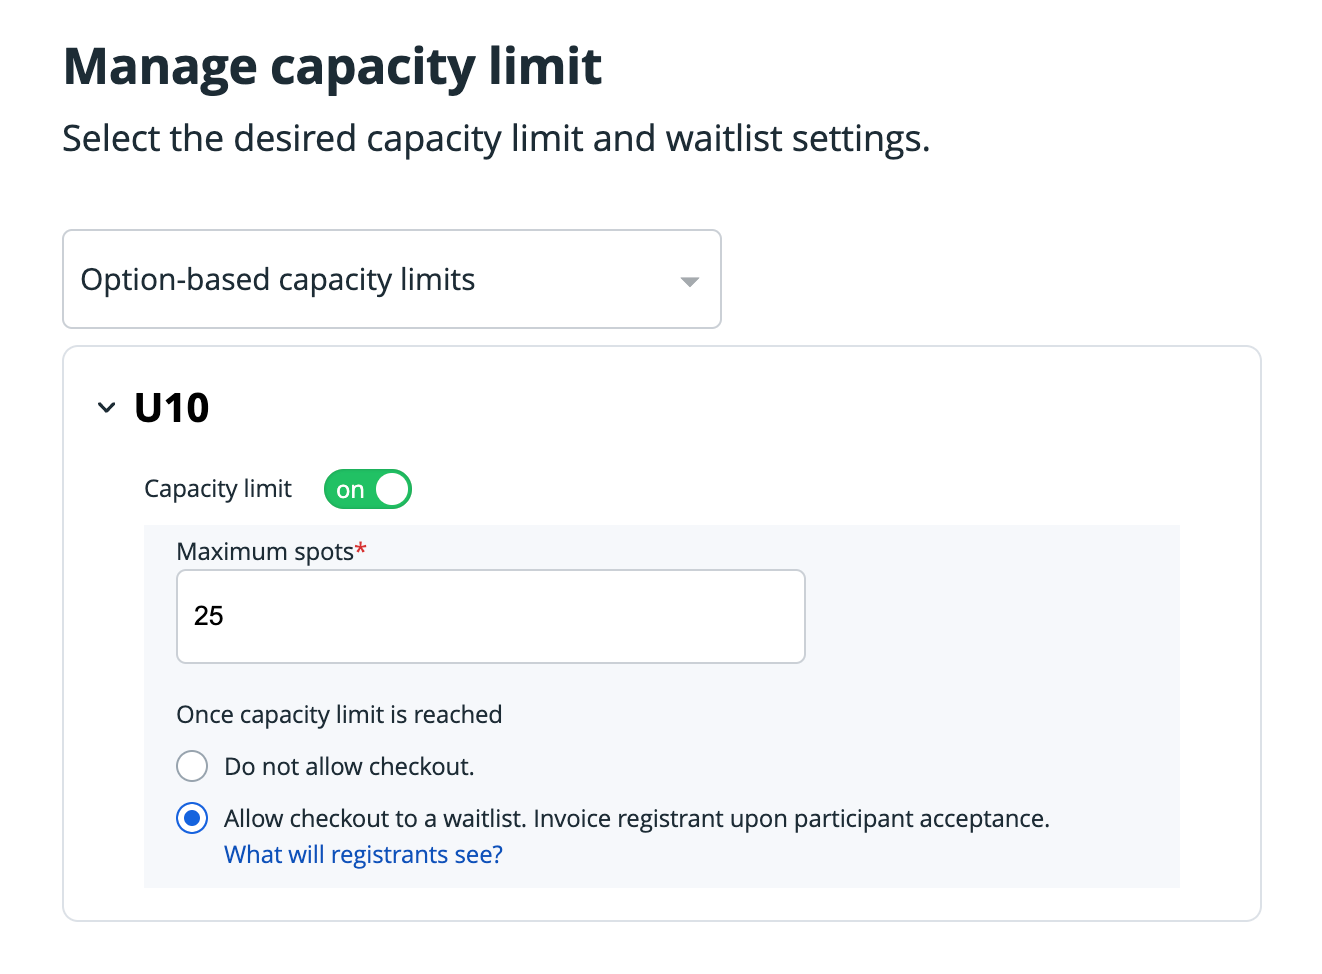
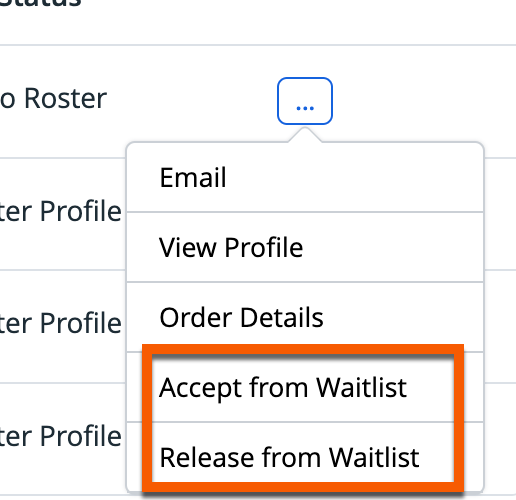
Capacity limits and waitlists
Set option-based capacity limits and enable waitlisting for options that reach total capacity. Efficiently manage waitlisted participants and assign them to rosters once spots become available.
Custom Questions & Logic
Effectively manage default and custom questions by editing attributes such as question labels, reporting identifiers, and question types. Configure optional or required questions, dynamically display questions using custom logic, and set up response-based fees and discounts.

Question Library
The question library ia a centralized catalog for storing and reusing questions across programs and forms. Saving custom questions to the question library makes them available for future use in other registration forms.

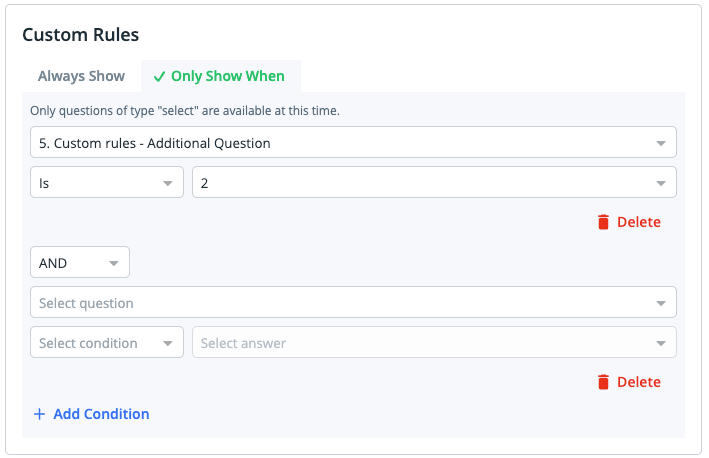
Custom rules
Create logic-based rules for custom questions to dynamically display fields based on specific answers, offering conditional questions tailored to participant responses.
Manage digital agreements
Toggle off digital agreements within registration forms by disabling the agreement next to each option. You can use this feature to temporarily suspend a digital agreement or provide users with an agreement-free registration option.

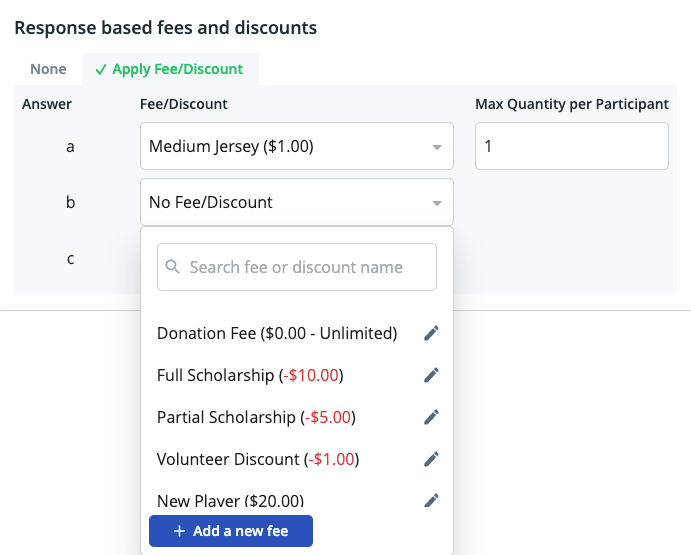
Response-based fees and discounts
Custom questions can trigger specific fees or discounts based on registrant responses. Set up maximum application limits per participant for added control.
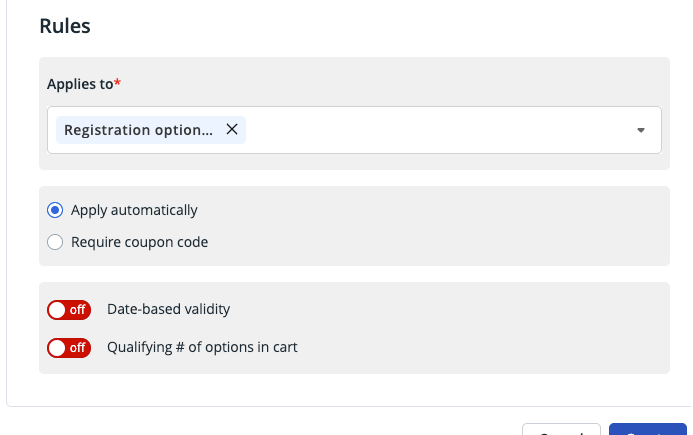
Discounts and coupon codes
Set automatic discounts based on coupon codes, date ranges, or the number of registration options added to a cart for enhanced registration flexibility.
Option-based deposit accounts
Multiple merchant accounts can be created to handle registration funds. Assign specific bank accounts to different registration options, streamlining fund allocation.
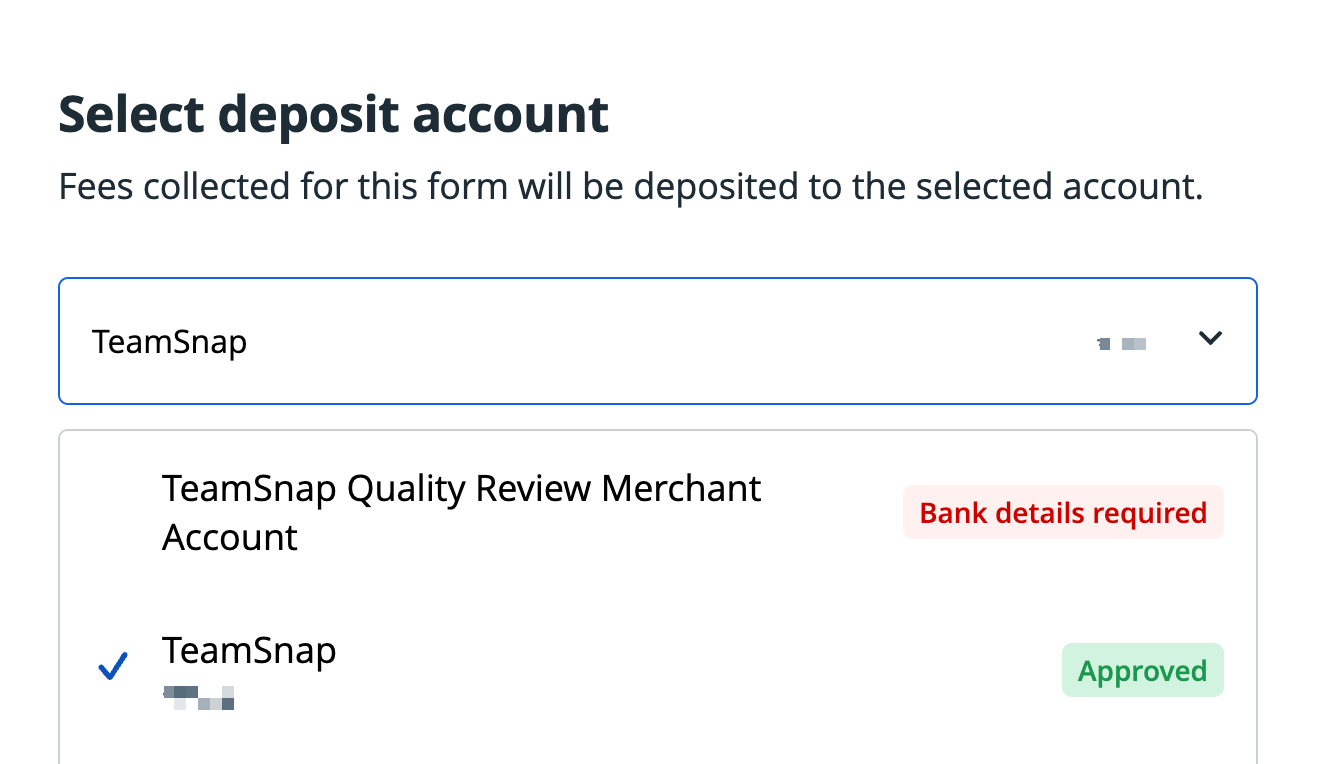
A screenshot example of multiple merchant accounts in different statuses as they appear in the registration form selection dropdown.
Payment Plan
Offer registrants payment flexibility by creating multiple payment plans. Configure payment amounts, installment frequency, and processing days to cater to diverse payment preferences.

Manage in-cart registration entries
If a registrant initiates a registration but does not complete the form, admin can delete the ongoing registration effortlessly by utilizing the action menu “...” from the registration reporting page.

Retire obsolete registration forms
Administrators can retire registration forms to ensure that only relevant and current registration options are in the purview of org and program admins.
